So I was just tinkering around when I started this blog.
I came across Ghost around this time last year (2024). I set it up and then forgot about it.
Recently, when I decided to start writing, I tried logging in from a different device than the one I used to register the Admin account and it required a verification code sent via email. I didn’t have mail configured.
With a little research, I found out Mailchimp is the recommended email provider.
I was disappointed, though: when I signed up my account was immediately flagged.
I quickly realized getting it activated wasn’t worth the effort, so I went looking for alternatives.
I didn’t want to use my primary Gmail account, but then it occurred to me — what would it take to run my own mail server?
In the course of my research, I came across a Reddit post in r/selfhosted where someone was looking for the same solution.
I figured I couldn’t be the only one facing this and someone there recommended Maddy.
I checked it out — it looked simple enough.
Some things were a bit confusing at first, but I eventually got it working.
Getting started
Maddy is a free and open-source, lightweight, modern mail server written in Go.
It’s an all-in-one solution for running a small mail server.
Prerequisites
- VPS or bare-metal server (with a public IP)
- Domain name (e.g., oddwired.com)
- Basic Docker & DNS knowledge
- A working Docker environment
Setup data directory
We'll need a directory to store Maddy’s config and data, and we'll bind mount it into the Docker container.
Using /data/maddy on the host as an example:
mkdir -p /data/maddy
Make sure Docker can read and write to it — e.g., if your Docker user is 1000:1000 (uid:gid):
sudo chown -R 1000:1000 /data/maddy
sudo chmod -R 755 /data/maddy
Setup TLS certificates
Maddy expects the TLS certificate at /data/tls/fullchain.pem and the private key at /data/tls/privkey.pem.
On the host, this means: /data/maddy/tls/fullchain.pem and /data/maddy/tls/privkey.pem.
Using Nginx Proxy Manager
We'll use Let’s Encrypt certificates and automate renewal.
In my case, I already had Nginx Proxy Manager running in Docker to manage other Let’s Encrypt certs.
NPM creates a cert directory under /letsencrypt/live inside its bind-mounted path on the host.
So I created a certificate for my mail server domain in NPM, then copied them into Maddy’s config directory (assuming /data/npm is the NPM bind mount):
cp /data/npm/letsencrypt/live/npm-1/fullchain.pem /data/maddy/tls
cp /data/npm/letsencrypt/live/npm-1/privkey.pem /data/maddy/tls
To automate copying on renewal, create /usr/local/bin/copy_certs.sh:
#!/bin/bash

SRC_DIR="/data/npm/letsencrypt/live/npm-1"
DEST_DIR="/data/maddy/tls"

cp "$SRC_DIR/fullchain.pem" "$DEST_DIR/fullchain.pem"
cp "$SRC_DIR/privkey.pem" "$DEST_DIR/privkey.pem"
Make it executable:
chmod +x /usr/local/bin/copy_certs.sh
Add it to crontab (crontab -e):
0 0 1 * * /usr/local/bin/copy_certs.sh
This runs on the 1st of every month.
Using certbot directly
If you prefer certbot, for mail.oddwired.com:
sudo certbot certonly --manual -d mail.oddwired.com
Then copy:
cp /etc/letsencrypt/live/mail.oddwired.com/fullchain.pem /data/maddy/tls
cp /etc/letsencrypt/live/mail.oddwired.com/privkey.pem /data/maddy/tls
And use the same script (/usr/local/bin/copy_certs.sh) to automate it — just update SRC_DIR to your certbot path.
Make sure permissions allow Docker to read them.
Initial run and DKIM key generation
When Maddy runs the first time, it creates its main config and DKIM keys (for DNS setup).
Run Maddy in Docker:
docker run \
  --name maddy \
  --restart unless-stopped \
  -e MADDY_HOSTNAME=mail.oddwired.com \
  -e MADDY_DOMAIN=oddwired.com \
  -v /data/maddy:/data \
  -p 25:25 \
  -p 143:143 \
  -p 587:587 \
  -p 993:993 \
  foxcpp/maddy:latest
Replace oddwired.com with your domain.
The hostname doesn’t have to be mail; it can be any subdomain.
If TLS certs are present, Maddy generates DKIM keys under /data/maddy/dkim_keys.
DNS records
Configure DNS to look roughly like this (adjust to your domain & IP):
oddwired.com.            A     10.2.3.4
oddwired.com.            AAAA  2001:beef::1

oddwired.com.            MX    10 mx1.oddwired.com.
mx1.oddwired.com.        A     10.2.3.4
mx1.oddwired.com.        AAAA  2001:beef::1

oddwired.com.            TXT   "v=spf1 mx ~all"
mx1.oddwired.com.        TXT   "v=spf1 a ~all"

_dmarc.oddwired.com.     TXT   "v=DMARC1; p=quarantine; ruf=mailto:[email protected]"

_mta-sts.oddwired.com.   TXT   "v=STSv1; id=1"
_smtp._tls.oddwired.com. TXT   "v=TLSRPTv1; rua=mailto:[email protected]"
DKIM keys
Maddy generated them under /data/maddy/dkim_keys/oddwired.com_default.dns.
Add to DNS as:
default._domainkey.oddwired.com. TXT "v=DKIM1; k=ed25519; p=nAcUUozPlhc4VPhp7hZl+owES7j7OlEv0laaDEDBAqg="
MTA-STS
Create a file served at https://mta-sts.oddwired.com/.well-known/mta-sts.txt:
version: STSv1
mode: enforce
max_age: 604800
mx: mx1.oddwired.com
TLSA (DANE)
Generate with gen_tlsa (port 25, tcp, domain=MX hostname):
_25._tcp.mx1.oddwired.com. TLSA 3 1 1 7f59d873a70e224b184c95a4eb54caa9621e47d48b4a25d312d83d96e3498238
Creating user accounts
Create SMTP login:
docker run --rm -it -v /data/maddy:/data \
  -e MADDY_DOMAIN=oddwired.com \
  -e MADDY_HOSTNAME=mail.oddwired.com \
  foxcpp/maddy:0.7 creds create [email protected]
Create IMAP account:
docker run --rm -it -v /data/maddy:/data \
  -e MADDY_DOMAIN=oddwired.com \
  -e MADDY_HOSTNAME=mail.oddwired.com \
  foxcpp/maddy:0.7 imap-acct create [email protected]
Make sure the bind mount matches the running container.
Sending the first email
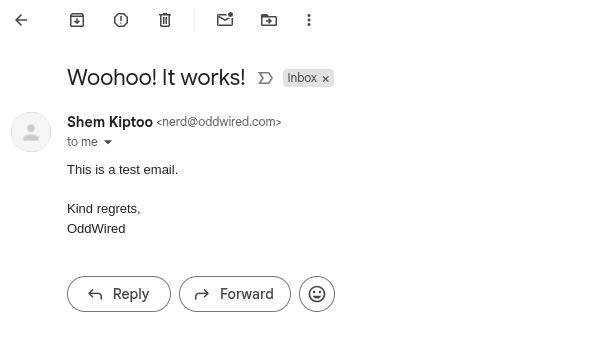
I set up an IMAP account on my Android phone and sent an email to my personal account — it worked!
It landed in spam initially, but it was delivered:

I tried to figure out why it landed in spam.
I couldn’t find a single definitive answer — but found something interesting (and maybe related):

Final thoughts
Running your own mail server isn’t for everyone — but if you’re curious and like to know how things work, Maddy makes it surprisingly approachable.