Networking is the backbone of the homelab. If the network is wonky, nothing else matters. In this post I’ll walk through how I connect the lab to the internet, how I control access, and how I expose services safely — plus why I chose the Cloudflare + DigitalOcean approach and how the Mikrotik shapes the whole thing.
Quick summary of goals
- Keep full control of routing and firewalling (Mikrotik is the brain).
- Safely expose chosen services to the internet with low latency where possible.
- Allow remote access even though my ISP doesn’t give me a stable public IP.
- Keep internal services isolated and easy to manage (Proxmox bridges, Pi-hole DNS).
ISP constraints and my approach
I use Safaricom Home Fibre. Their router sits behind NAT (no stable external IP, often changes on restart). That means inbound connections directly to my home network are unreliable or impossible.
So my strategy is this:
- Treat the ISP router as a dumb gateway/bridge — disable its Wi-Fi and let Mikrotik control everything.
- Use outbound tunnels from the homelab to cloud hosts (Cloudflare Tunnel and a DigitalOcean droplet) so I don’t rely on an inbound public IP at home.
The Mikrotik: single control plane
Everything on the LAN is managed from the Mikrotik. It handles:
- DHCP (per-VLAN/subnet if needed)
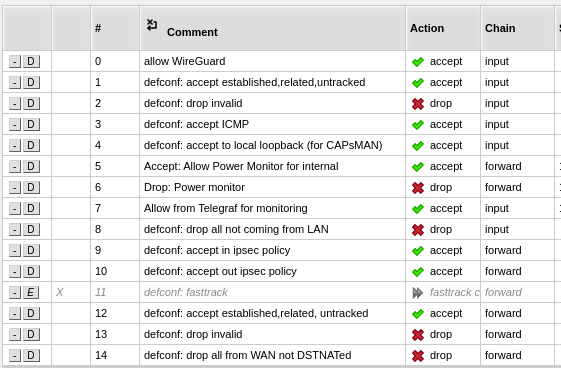
- Firewall rules (WAN input drop, allow established, block specific internal devices)
- Port forwarding when necessary
- Segmentation (lab, personal, guests)
I block all unsolicited WAN input at the edge and only permit necessary outbound traffic and established/related responses. I also maintain address-lists for devices I want to prevent from reaching the internet (handy for intentionally offline test devices).
Remote access: Cloudflare Tunnel + DigitalOcean Wireguard
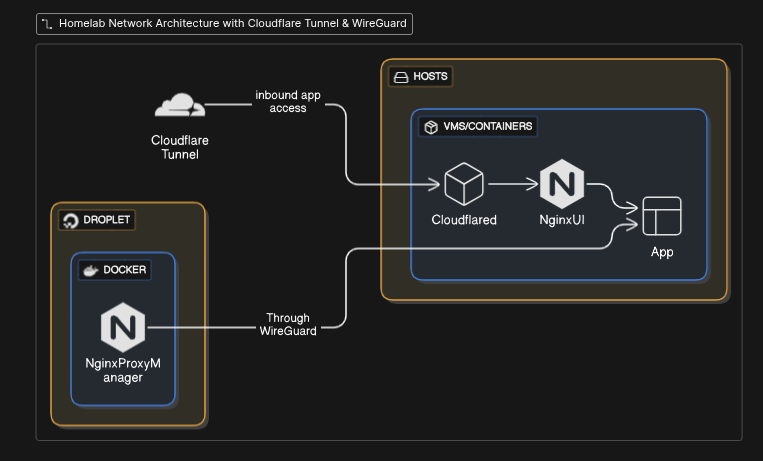
I use two remote access paths so I get the best of both worlds:
Cloudflare Tunnels (my primary, low-latency path)
- I run
cloudflaredin the homelab and expose most web apps via Cloudflare Tunnel. - The tunnel points to a container running NginxUI inside the lab. Nginx receives the HTTP requests and routes based on Host headers to the right VM/container.
- Cloudflare handles DNS and edge TLS — I configured my tunnel to forward HTTP to Nginx (Cloudflare terminates TLS at the edge). That keeps the local end simple and secure.
Why I use it: quick, low latency for most web apps, easy hostname mapping, and I can rely on Cloudflare’s network for acceleration.
Caveat: streaming large video via Cloudflare Tunnel can violate Cloudflare’s TOS (and can be a poor fit for high-bandwidth streams). That’s why I also have a second path.
DigitalOcean droplet + Wireguard (my streaming fallback)
- I run a small DigitalOcean droplet that acts as a Wireguard peer and also hosts Nginx Proxy Manager in Docker.
- The homelab creates an outbound Wireguard tunnel to the droplet. Once the tunnel is up, the droplet can proxy traffic to/from the lab over the secure tunnel.
- Nginx Proxy Manager on the droplet handles Let's Encrypt and forces HTTPS (redirect HTTP → HTTPS on port 443). I use this path for Jellyfin/streaming and a few critical apps that must stay reachable.
Reverse proxies and routing
- NginxUI (in-lab) — main HTTP entry for Cloudflare Tunnel. It routes traffic to services based on Host header. Lightweight and transparent.
- Nginx Proxy Manager (on DO) — public-facing TLS/ACME handling and the proxy for streaming. It renews certificates automatically with Let's Encrypt and enforces HTTPS.
Proxmox networking: dedicated bridge + IP pool
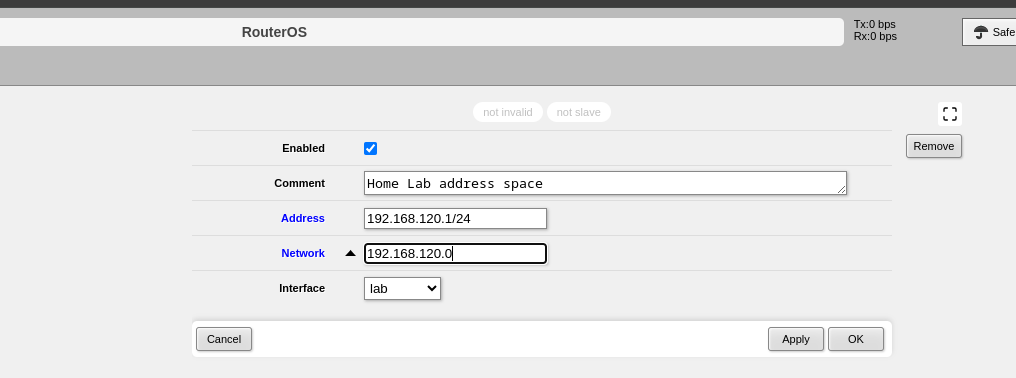
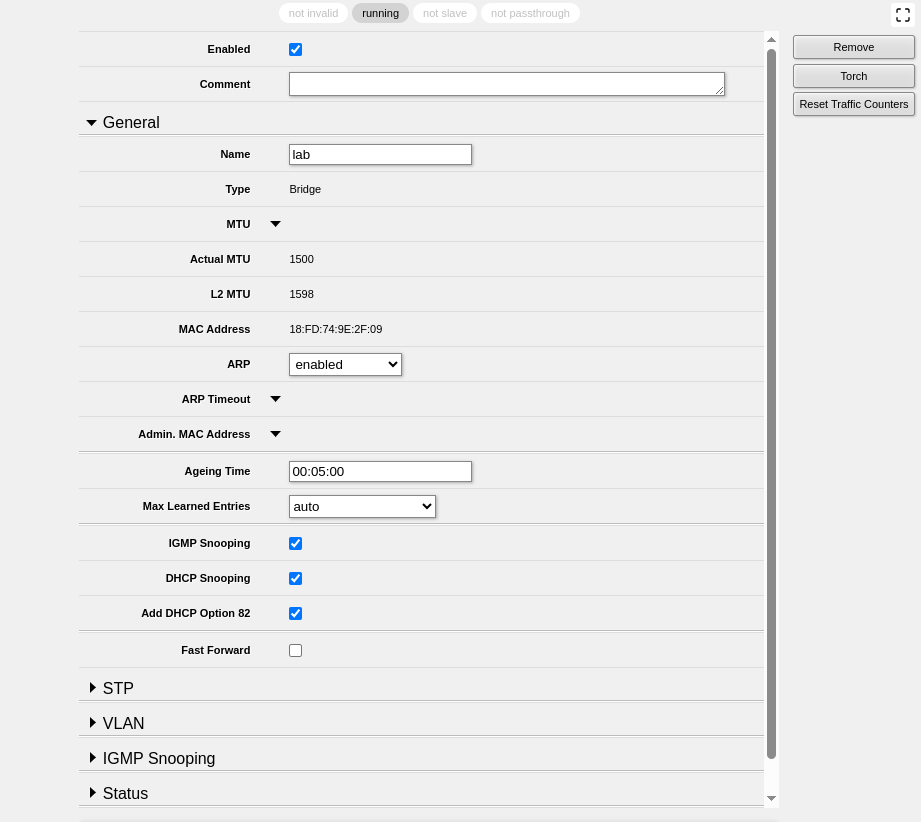
To keep VM/container networking sane, I created a dedicated bridge with its own IP pool for lab VMs. Benefits:
- Easier firewall rules on Mikrotik (per-subnet rules)
- Cleaner traffic separation (no accidental exposure of management interfaces)
- Simpler DHCP/lease management
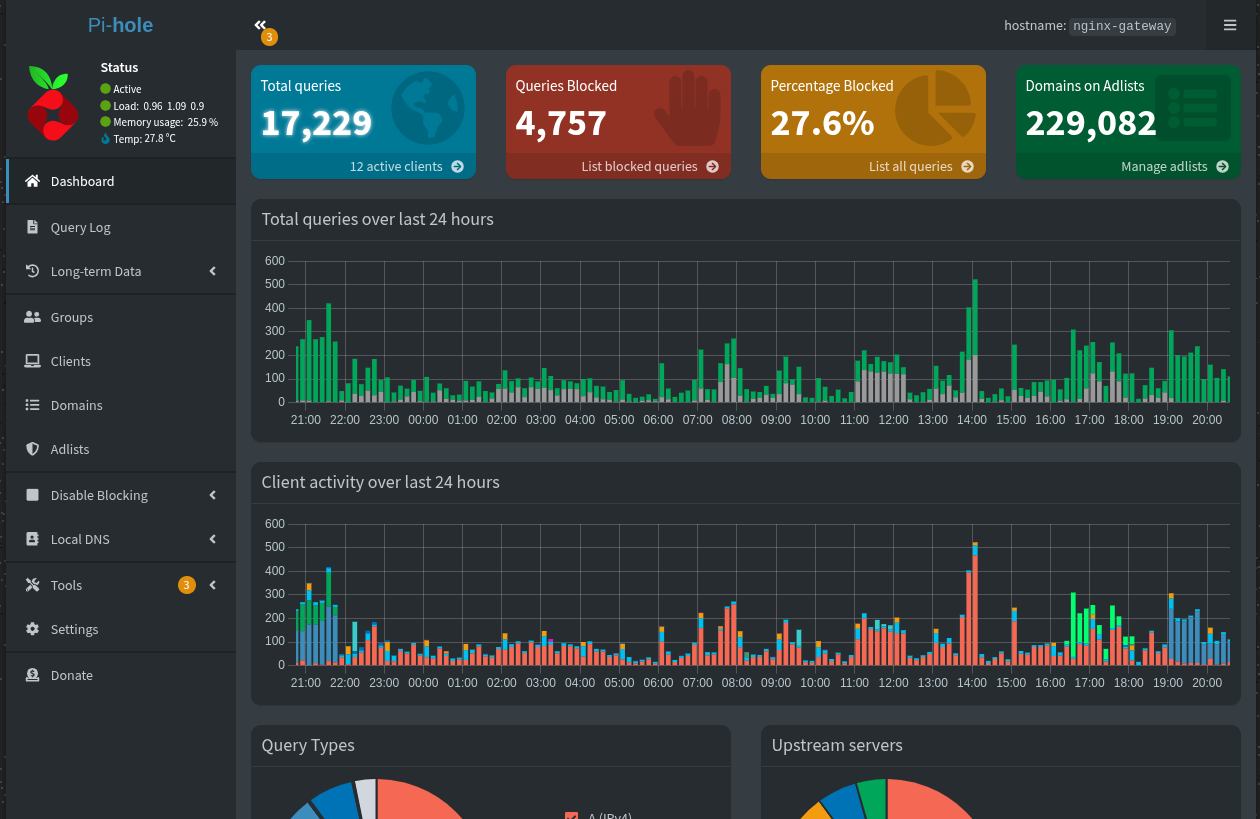
DNS: Pi-hole as local resolver
Pi-hole runs in a container and is the default DNS for the network. It provides ad-blocking and local name resolution.
Two tips:
- Use upstream resolvers that you trust (Cloudflare, Quad9, or DoT/DoH) for privacy and speed.
- Enable conditional forwarding in Pi-hole if you want DNS names for devices handled by the ISP router or other network segments.
Monitoring: Speedtest Tracker
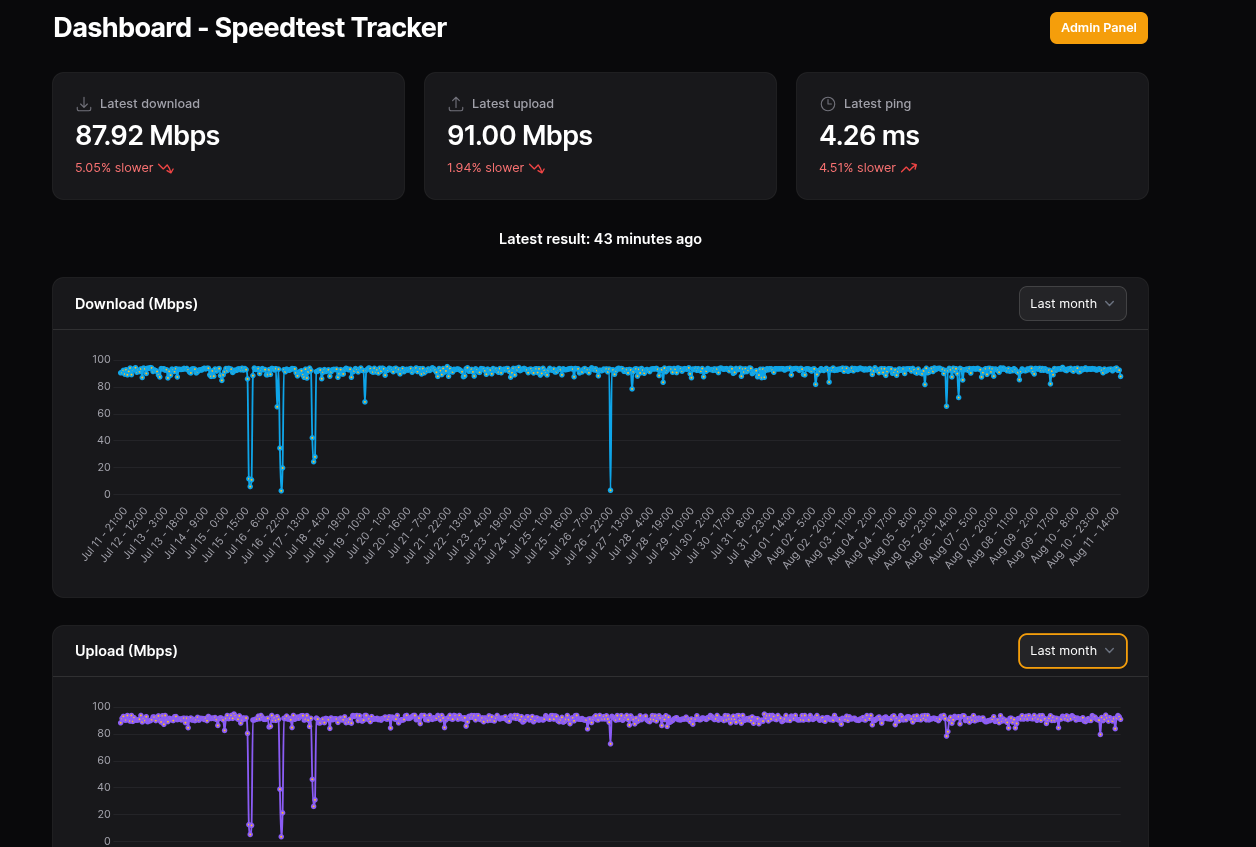
I have Speedtest Tracker polling hourly so I can spot slowdowns and outages over time. The graph helps correlate issues (ISP flakiness vs. homelab problems).
Security & operational notes
- Edge firewall: keep the Mikrotik strict — allow only established traffic and management from known admin IPs.
- Harden remote hosts: SSH keys, no password SSH, fail2ban on critical VMs and 2FA where possible.
- Limit Cloudflare tunnel scope (Cloudflare Access, IP restrictions) for admin apps.
- Monitor cert renewal for DO droplet (Nginx Proxy Manager usually handles it).
- Backups: back up your
cloudflaredcredentials, Wireguard keys, and Proxmox VM configs.
Closing Thoughts
Networking is the quiet hero of my homelab. The combination of a locked-down Mikrotik, dual remote access paths, clean Proxmox network segmentation, and Pi-hole DNS has kept things smooth and secure. In the next post, I’ll dive into the virtualization layer — how I run my VMs and containers