Back in 2022, a few months into a new role at a large corporation, I quickly ran into a wall.
Every time I wanted to experiment, spin up or get access to a test VM or even run a simple script, there was bureaucracy waiting: change approvals, limited access rights and a watchful cybersecurity team ready to raise tickets for “suspicious activity.” And let’s be honest: nobody wants to be the guy who accidentally takes production down.
So, I decided to build my own playground at home — a space where I could break stuff freely, learn new tools and explore ideas without worrying about approvals or red tape.
Starting Small: The Hardware
I got my first gear:
- 3× refurbished Lenovo ThinkCentre M700 Tiny PCs
Each came with an Intel Core i7‑6700T, 8GB RAM and a 500GB HDD. - 8‑port TP‑Link unmanaged switch to hook everything together.
- Mikrotik router to handle routing and firewalling.
- And, of course, a handful of Ethernet cables and RJ45 plugs.
Not bad for a start — but pretty soon, I wanted more horsepower.
I upgraded each ThinkCentre to 24GB RAM and added 128GB M.2 SSDs to speed up storage. They’re small, quiet and don’t use much power, which makes them perfect for a home rack or even just sitting under a desk.
The AI Workhorse Joins the Cluster
More recently, I added a more powerful node specifically for AI experiments — running local LLMs, Ollama, and other GPU workloads.
Specs:
- Intel Core i7‑10700 CPU
- 64GB RAM
- 256GB NVMe SSD (OS) + 2TB HDD (storage)
- NVIDIA RTX 2060 Super (8GB VRAM)
I integrated it directly into the Proxmox cluster alongside the ThinkCentres.
This setup allows me to:
- Run GPU-accelerated workloads via passthrough
- Test containerized model servers (like Ollama and LM Studio)
- Schedule resource-intensive jobs directly through the same cluster UI
Connecting It All: Networking
I use Safaricom Home Fibre for internet.
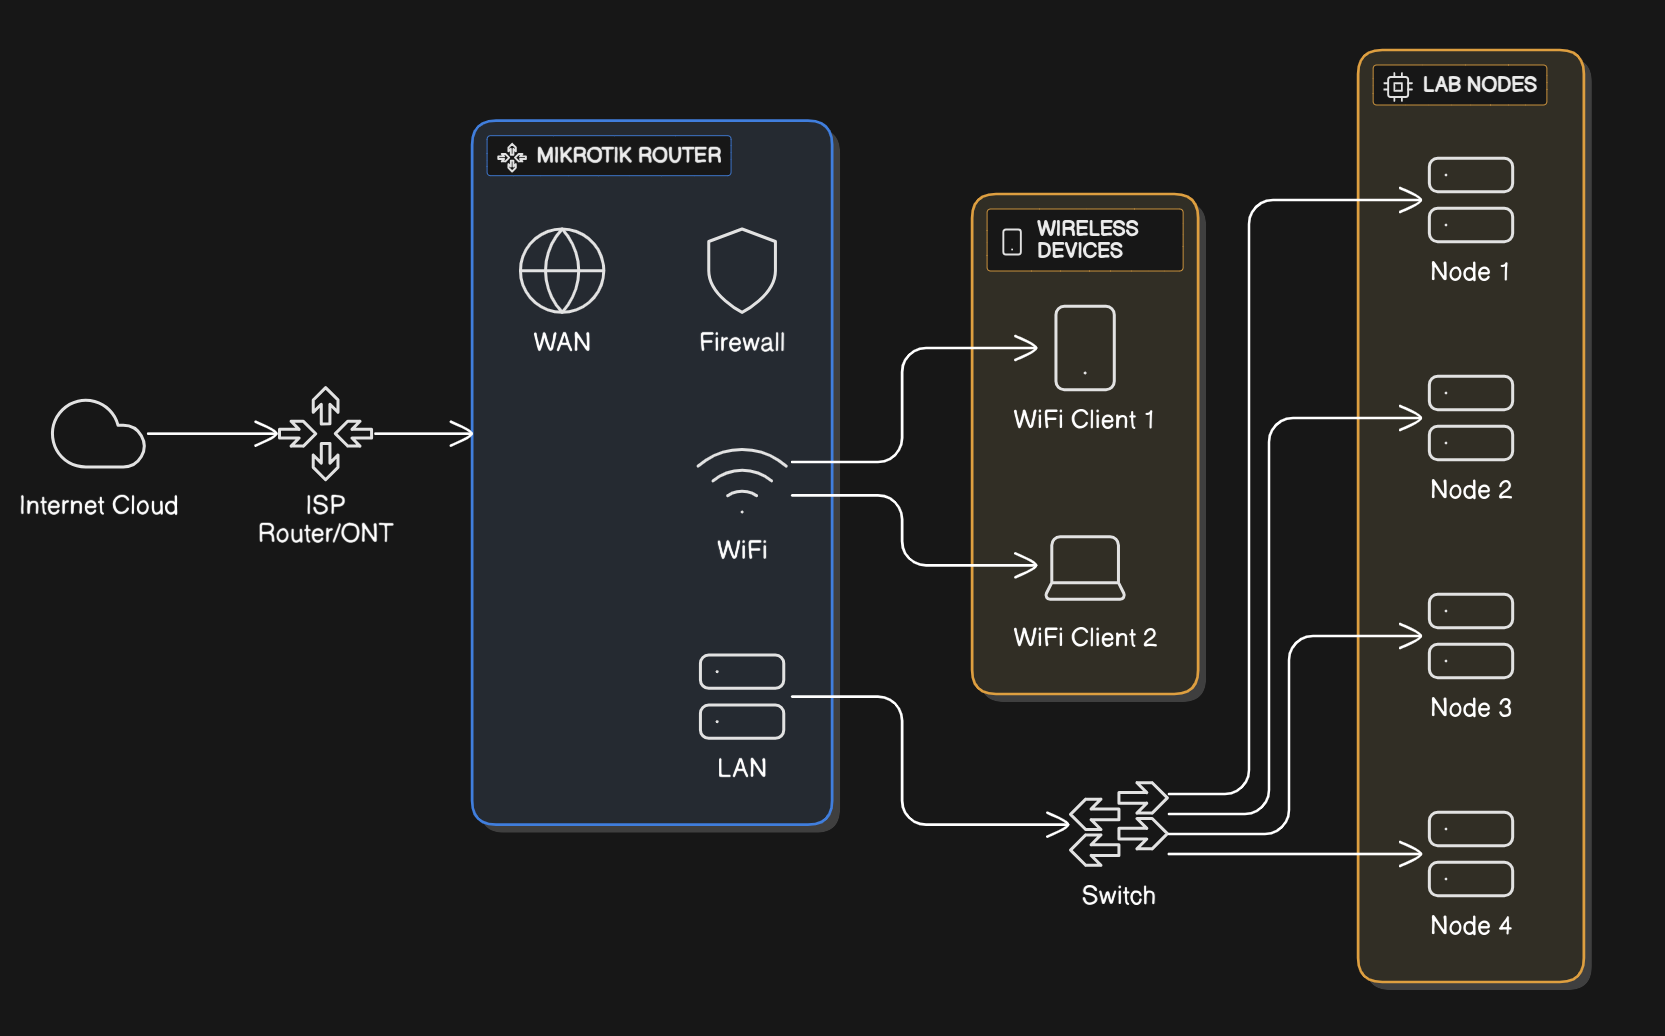
The ISP provides a router, but instead of relying on it, I disabled Wi‑Fi on the ISP router and connected it directly to the Mikrotik router using a static IP address. From there, the Mikrotik does everything:
- Handles DHCP & firewall
- Controls port forwarding
- Segments my network (e.g. lab, personal devices, guests)
This way, the ISP router is just a dumb bridge, and I get full control over my home network.
Virtualization with Proxmox VE
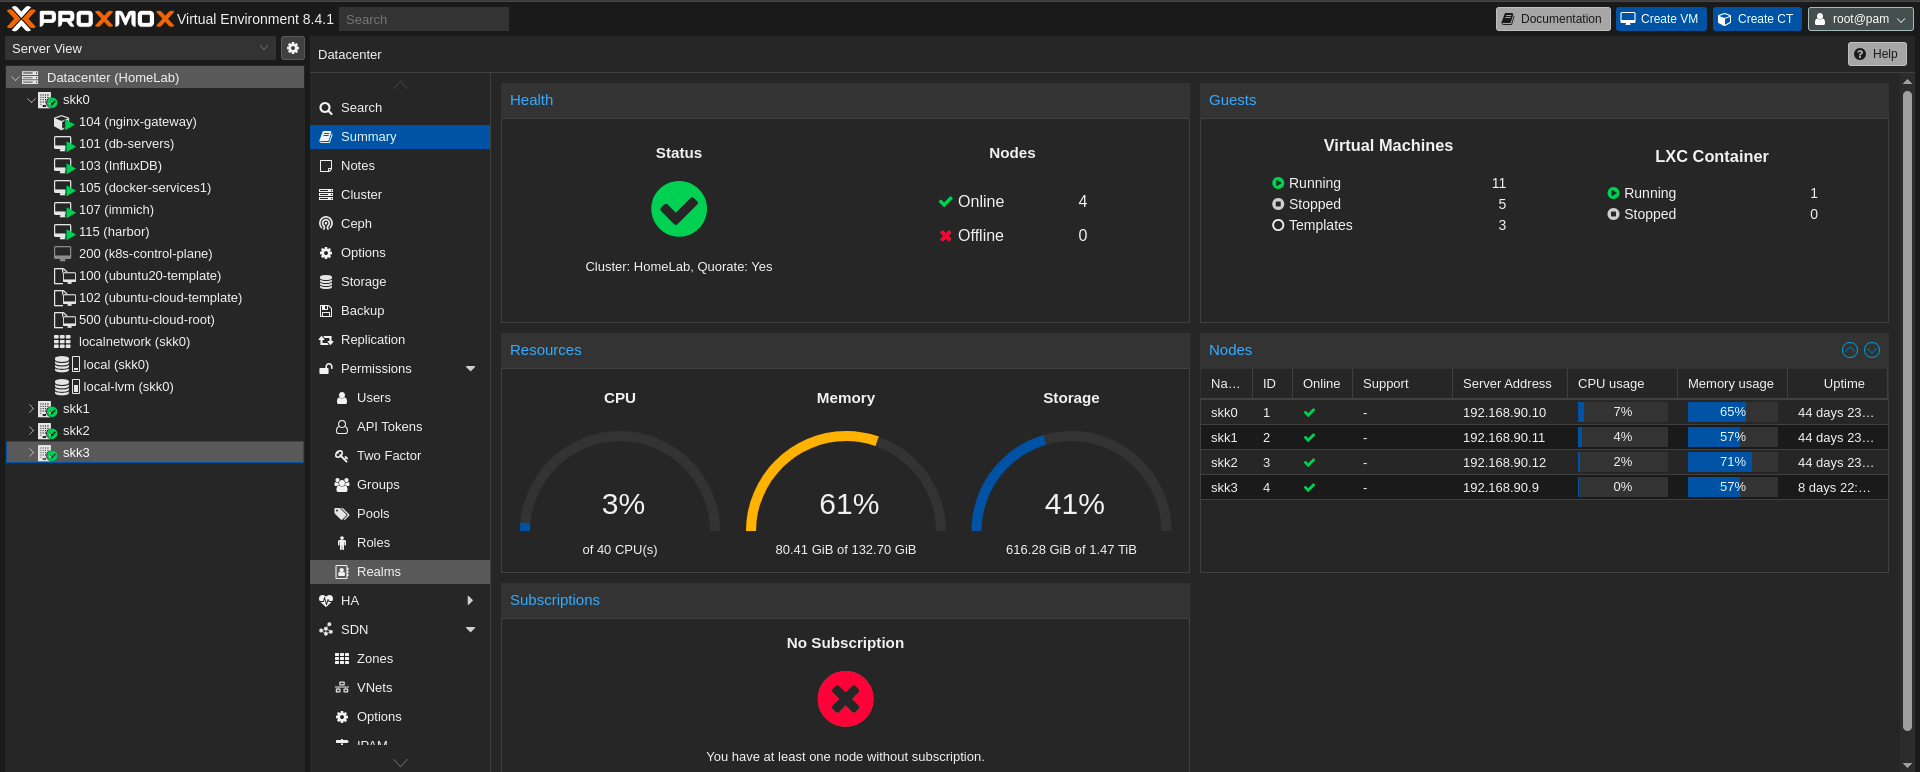
Each node runs Proxmox VE — an open‑source virtualization platform that’s lightweight, powerful and beginner‑friendly.
I joined the nodes into a single Proxmox cluster, which means I can:
- Spin up VMs and LXC containers as I need them
- Test things like live migration
- Play with snapshots and backups
- Break stuff and roll back safely
Proxmox gives me a nice web interface, CLI tools, and lots of flexibility — perfect for a homelab.
Why Bother?
At first, it was about freedom: doing what I couldn’t do at work.
Over time, it became much more:
- A testbed for tools and technologies I don’t use daily
- A way to learn networking, virtualization and self‑hosting by actually doing
- And honestly? Just fun to build and improve over time
What’s Next
In this series, I’ll dive into:
- Networking in the homelab — including how I set up and configured the Mikrotik router.
- Self‑hosted services — from dashboards to personal tools.
- Monitoring & observability — because knowing what’s running (and what’s broken) is half the game.
I’ll share lessons learned, what worked, what didn’t and why I made certain choices.
If you’re thinking of building your own homelab — or just curious how it all fits together — stick around.

